Sunday, January 29, 2012

Maxillary Complete Denture and Mandibular Complete Denture Converted to a 2 Implant Overdenture

This patient had recently been treated with new maxillary and mandibular removable complete arch dental prostheses.  A couple months post insertion, the patient reconsidered the mandibular implant option originally presented prior to starting treatment and requested a two implant mandibular overdenture.  The pictures below share the process of planning for the implant placement and eventually converting his existing mandibular complete denture into a two implant overdenture.  The existing prostheses were in excellent condition.

The original mandibular prosthesis was duplicated in clear ortho-jet acrylic resin.  The duplicate was then used to identify the amount of bone reduction needed to provide about 16 mm of prosthetic space (this amount of space was requested in order to provide adequate prosthetic space for a future fixed detachable prosthesis).  Also, the lingual flange was removed lingual to the anterior and premolar teeth to allow the remaining buccal/labial portion of the guide to visualize the buccal extent to which the implants may be placed.  Radiographic spheres were also embedded in the guide to allow the surgeon to obtain a panoramic radiograph and calculate the magnification error.
 

This photo demonstrates the healed tissue around the implants with the appropriate size locator abutments in place.  NOTE: post implant placement the patient's existing complete denture was left out for about a week.  It was then relined with a soft intraoral denture re-lining material.  The soft liner was replaced about every month for the next three months.  The implants were uncovered at three months post placement and straight walled healing abutments were inserted.  Two weeks after uncovering the implants the tissue was measured for proper locator abutment height.


The locator abutments were inserted, hand tightened, and the processing housings were placed onto the abutment with the white silicone gasket in place.  The intaglio surface of the current complete denture was uniformly relieved about 1 mm to allow for adequate space for a reline PVS pick-up impression.  NOTE: prior to making the impression the current OVD was identified and recorded.  The record was used to ensure the OVD was maintained while making the impression. 


 The impression was then sent to the lab for a lab processed hard reline.  Once the reline was complete it was inserted into the patient's mouth.  NOTE: the locator abutments were removed and the healing abutments were re-inserted into the patient's mouth.  Appropriate adjustments were made to the denture (PIP, sorensons paste, and articulation) and the patient took the denture home and wore it for 24 hours.  The following day the patient returned and appropriate adjustments were made to ensure proper fit and articulation of the denture.  The locator abutment were re-inserted and the female metal housings with the black processing retention were inserted with the silicone white gaskets in place. The re-lined denture was then inserted into the mouth and relieved if necessary over the housing areas to ensure complete seating of the denture could be achieved.  NOTE: OVD was recorded prior to picking up the housings in the mouth to ensure OVD would not be changed during the housing pick up process.  Fast curing acrylic resin was then lightly placed into the relieved areas of the denture and inserted into the patient's mouth and lightly held in place until cured.  NOTE: the housings need to be dry prior to inserting the denture

The prosthesis is remove and flash acrylic is removed.  The black plastic retentive inserts are removed and the appropriate retentive inserts are placed into the metal housings.  It was then tried back into the patient's mouth to verify complete seating and the patient's ability to insert and remove.  The occlusion was then checked and adjusted.


Tuesday, January 24, 2012

Posterior Fixed Rehabilitation (limited Space): 2 FPDs, 1 Implant FPD, 4 PFMs

 Patient just completed orthodontic treatment.  Originally the patient was planned for an increase in vertical dimension of occlusion to allow more room for a comprehensive restorative rehabilitation.  Due to personal matters the patient was no longer able to afford the complete rehabilitation and elected to proceed with restoring the posterior teeth only with a full understanding of the limitation of space for adequate esthetics regarding her future restorations.
NOTE: This was a panadent system case, which resulted in minimal insertion adjustments to the crowns.  If accurate mountings, tracings, and most importantly inter-occlusal records are obtained; minimal adjustments should e expected.
Initial patient photo regarding dentition.


Friday, January 20, 2012

AnteriorTooth Screw Retained Implant Provisional Crown with Zimmer Carrier


Initial Intraoral photo

  Diagnostic Mounting with Diagnostic Wax Up


 Surgical Guide for Maxillary implants (use while increasing drill size)


Surgical Guide for Maxillary Implants (location and angulation guide)


Implant Location Index using surgical guide day of implant placement (GC pattern Resin and Zimmer implant carrier)


Original Cast Duplicate with area removed for implant analog placement


Implant index on duplicate cast


Analog in place using low expansion stone.  Abutment on analog.  Abutment fabricated from a Zimmer implant carrier and sand blasted to remove color.

Occlusal View of analog and abutment on cast.  Note: it is important to contour the cast by removing unwanted stone around the abutment to allow for better emergence of the crown.  The emergence may need adjusting after trying it in the mouth.


 Jet acrylic in a matrix placed over the abutment site.  Processed in warm water and a pressure pot.


Untrimmed provisional on cast after pressure pot curing.


Occlusal view

Preliminary trimming of the provisional prior to polishing.  Note: it will most likely be necessary to add appropriate acrylic at the cervical portion of the provisional with it off the cast, cure it again, and trim to proper contours with a bur.  Careful not to touch the burn to the metal abutment.

 Occlusal View


 Patient smiling with provisional crown in place.


Retracted view of provisional crown day of uncover/insertion.


1 month photo of provisional in the mouth.  Note: brush beading acrlyic to the cervical may be necessary to obtain the proper contours for your implant provisional (not done here)


FINAL CROWNS


Thursday, January 19, 2012

True Immediate Maxillary Complete Denture and Rotational Path Mandibular RPD

This case was pretty fun.  The patient came in with a need to extract all their maxillary teeth and mandibular anterior teeth due to severe aggressive periodontal disease.  An immediate maxillary complete denture was fabricated in conjunction with a mandibular interim RPD.  Teeth were selected using his natural teeth as a guide for mold selection, shade was selected per the patient's request.  The patient absolutely loved the tooth selection and arrangement of his immediate denture.  Thus after several months of healing and management of the patient with soft liners the maxillary interim denture was re-fitted to his stable maxillary arch with a lab processed hard re-line.  Once that was complete a rotational path RPD was designed, fabricated, and delivered.  The following shows a picture representation of the basic process.


Sunday, January 15, 2012

Traditional Rehabilitation - Mandible 2 crowns, 3 FPDs

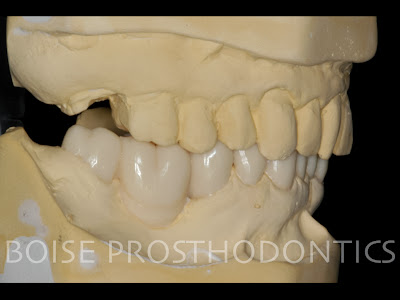
  Thought I would show the most recent diagnostic wax up I've been working on.  It's for a mandibular fixed rehab.  The patient came in and wanted the spaces "filled" where he is currently missing teeth other that that he is completely satisfied with his teeth.  After a closer examination it was noted that there was insufficient bony anchorage for implants.  So, we discussed the possibilities of restoring his mouth with traditional FPDs and he liked the idea.