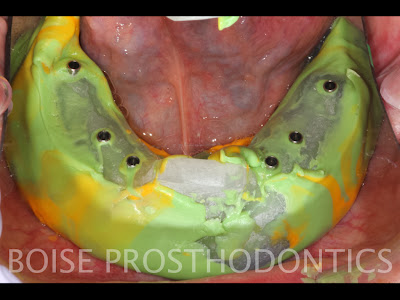
Intra-oral Luting of Implant Verification Jig and Pick-up Impression for Mandibular Hybrid
- Label each individual GC pattern covered direct impression transfer post with it's appropriate location.
- Hand tighten each post onto the appropriate implant.
- Ensure the GC pattern resin is not touching when in place.
- If margins are subgingival and seating verification cannot be visualized, peri-apical radiographs may be necessary to verify complete seating of the transfer posts.
- Isolate the area from saliva using cotton rolls and gauze.
- Brush bead the gaps between each direct transfer post with GC pattern resin.
- Ensure the GC pattern resin fills the space entirely.
- Allow, GC pattern resin to polymerize for 10 minutes.
- Loosen impression screws and remove from the patient's mouth.
- Place the verification jig on the original cast and verify passivity of fit.
- If the jig seats completely and passively on the preliminary cast no verification jig pick-up impression is needed.
- If the jig does not seat passively proceed with the custom tray verification jig pick-up impression.

- Re-attach the verification jig to the implants in the patient's mouth and hand tighten.
- Verify fit of the custom tray over the verification jig while in the mouth
- Make adjustments to the tray if necessary
- Apply adhesive to the inner surface of the tray.
- Isolate the verification jig in the mouth from saliva.
- Apply light body polyvinylsilosane around the verification jig.
- Apply heavy body polyvinylsiloxane to the internal aspect of the tray simultaneously.
- Insert into the patient's mouth and wipe away excess from the screw access holes. Have the pooch and smile to border mold
- Leave impression material in place with patient relaxed for 5 minutes.


No comments:
Post a Comment